SPF DKIM DMARC- Links

We have multiple links available to check if the mail server are correctly configured.

To check reverse DNS

http://viewdns.info/

http://mxtoolbox.com/

Check MX records for domain

http://mxtoolbox.com/NetworkTools.aspx

http://viewdns.info/reversedns/

Check if the IP/domain is blacklisted for spam

http://mxtoolbox.com/NetworkTools.aspx

http://viewdns.info/spamdblookup/

http://www.abuseat.org/lookup.cgi

Check if the server is configured for open relay

www.mailradar.com/openrelay/

http://mxtoolbox.com/diagnostic.aspx

SPF Records

To create spf record and validate

www.kitterman.com/spf/validate.html

www.spfwizard.net/

https://www.mail-tester.com/spf-dkim-check

DKIM Record

http://www.appmaildev.com/en/dkim/

https://www.mail-tester.com/spf-dkim-check

http://dkimcore.org/c/keycheck

DMARC Records

https://www.fraudmarc.com/dmarc-check/

https://otalliance.org/resources/spf-dmarc-tools-record-validator

SSL CHECK

https://www.ssllabs.com/ssltest/analyze.html?d=mc.swipezoom.com

https://www.sslshopper.com/ssl-checker.html

mail reputation

https://www.senderscore.org/lookup.php?lookup=plesk11.tronic.com.au&validLookup=true

https://www.senderbase.org/lookup/?search_string=plesk11.tronic.com.au

Posted in CPanel, DNS, Exim, Linux, Mail server, Plesk, Postfix | Tagged , , , | Leave a comment

InnoDB Corruption and Recovery

Databases get corrupted for many reasons. In my case, our  hard drive went down during writes to the database from a power failure. InnoDB corruption can cause all of the databases running on that server to become inaccessible.

My server is Centos 5.x, MySQL 5.5 . Ubuntu and Debian flavors will differ and good command-line knowledge is helpful here. You will not be able to do any of these steps without shell access to your server via SSH.  You also will not be able to repair or check your tables via phpmyadmin or other interface.

InnoDB corruption can cause all of the databases running on that server to be inaccessible.  Without going into the technical reasons as to why that is, you will find that your databases are unavailable and your MySQL server just won’t start.  You may get a simple response from the MySQL server like:

Starting MySQL..The server quit without updating PID file (/var/lib/mysql/linux.server.com.pid).[FAILED] or MySQL server PID file could not be found!

These errors can only usually be found when trying to re-start the MySQL server. You must now dig deeper, this is where checking the MySQL error log for “linux.server.com” will somewhat give you an idea as to what to do next.

First, we have to get to the server and this is where command-line experience comes into play. You should have root access to your server running MySQL. Let’s take a look at the MySQL error log for linux.server.com:

tail -500 /var/lib/mysql/linux.server.com.err


130306 22:02:18 mysqld_safe Number of processes running now: 0
130306 22:02:18 mysqld_safe mysqld restarted
130306 22:02:18 [Note] Plugin 'FEDERATED' is disabled.
130306 22:02:18 InnoDB: The InnoDB memory heap is disabled
130306 22:02:18 InnoDB: Mutexes and rw_locks use GCC atomic builtins
130306 22:02:18 InnoDB: Compressed tables use zlib 1.2.3
130306 22:02:18 InnoDB: Using Linux native AIO
130306 22:02:18 InnoDB: Initializing buffer pool, size = 128.0M
130306 22:02:18 InnoDB: Completed initialization of buffer pool
130306 22:02:18 InnoDB: highest supported file format is Barracuda.
130306 22:02:18 InnoDB: 5.5.30 started; log sequence number 1629186928
130306 22:02:18 [Note] Server hostname (bind-address): '0.0.0.0'; port: 3306
130306 22:02:18 [Note] - '0.0.0.0' resolves to '0.0.0.0';
130306 22:02:18 [Note] Server socket created on IP: '0.0.0.0'.
130306 22:02:18 [Note] Event Scheduler: Loaded 0 events
130306 22:02:18 [Note] /usr/sbin/mysqld: ready for connections.
Version: '5.5.30-cll' socket: '/var/lib/mysql/mysql.sock' port: 3306 MySQL Community Server (GPL)
130306 22:02:19 InnoDB: Assertion failure in thread 47204348393792 in file trx0purge.c line 840
InnoDB: Failing assertion: purge_sys->purge_trx_no <= purge_sys->rseg->last_trx_no
InnoDB: We intentionally generate a memory trap.
InnoDB: Submit a detailed bug report to http://bugs.mysql.com.
InnoDB: If you get repeated assertion failures or crashes, even
InnoDB: immediately after the mysqld startup, there may be
InnoDB: corruption in the InnoDB tablespace. Please refer to
InnoDB: http://dev.mysql.com/doc/refman/5.5/en/forcing-innodb-recovery.html
InnoDB: about forcing recovery.
03:02:19 UTC - mysqld got signal 6 ;
This could be because you hit a bug. It is also possible that this binary or one of the libraries it was linked against is corrupt, improperly built,or misconfigured. This error can also be caused by malfunctioning hardware.

We will try our best to scrape up some info that will hopefully help diagnose the problem, but since we have already crashed, something is definitely wrong and this may fail.

Steps to get it back up.

1. Stop mysqld.
2. Backup /var/lib/mysql/ib*
3. Add the following line into /etc/my.cnf

innodb_force_recovery = 4

4. Restart mysqld.
5. Dump all tables:# mysqldump -A > dump.sql
6. Drop all databases which need recovery.
7. Stop mysqld.
8. Remove /var/lib/mysql/ib*
9. Comment out innodb_force_recovery in /etc/my.cnf
10. Restart mysqld. Look at mysql error log. By default it should be /var/lib/mysql/server/hostname.com.err to see how it creates new ib* files.
11. Restore databases from the dump:mysql < dump.sql

**Hint : A simple query for finding all of your InnoDB tables in case you want to specifically target the corruption.

SELECT table_schema, table_name FROM INFORMATION_SCHEMA.TABLES WHERE engine = 'innodb';

Posted in Linux, MySQL | Tagged , | Leave a comment

Set Password Policy in Mysql 5.6

——————————————————————————————-
1) INSTALL PLUGIN loads the plugin, and also registers it in the mysql. plugins table
to cause the plugin to be loaded for each subsequent normal server startup.
——————————————————————————————-

mysql> INSTALL PLUGIN validate_password SONAME  'validate_password.so';

——————————————————————————————-
2) Edit my.cnf file & Add following 2 parameters in my.cnf
——————————————————————————————-

# vi /etc/my.cnf

[mysqld]
plugin-load=validate_password.so
validate-password=FORCE_PLUS_PERMANENT

——————————————————————————————-
3) Login Mysql & Set Following parameters as per your requirement
——————————————————————————————-

[root@maindb ~]# mysql -u root -p
Enter password:


mysql> SET GLOBAL validate_password_length = 8;
Query OK, 0 rows affected (0.00 sec)

mysql> SET GLOBAL validate_password_number_count = 3;
Query OK, 0 rows affected (0.00 sec)

mysql> SET GLOBAL validate_password_special_char_count = 3;
Query OK, 0 rows affected (0.00 sec)

——————————————————————————————-
4) Check Parameters
——————————————————————————————-

mysql> SHOW VARIABLES LIKE 'validate_password%';
+--------------------------------------+--------+
| Variable_name                        | Value  |
+--------------------------------------+--------+
| validate_password_dictionary_file    |        |
| validate_password_length             | 8      |
| validate_password_mixed_case_count   | 1      |
| validate_password_number_count       | 3      |
| validate_password_policy             | MEDIUM |
| validate_password_special_char_count | 3      |
+--------------------------------------+--------+
6 rows in set (0.00 sec)

——————————————————————————————-
5) Test With Following Password
——————————————————————————————-

select password('test');
select password('Test@12345');
select password('Test@123456789');
select password('Test@!#123456789');
[root@maindb ~]# mysql -u root -p
Enter password:

mysql> GRANT ALL PRIVILEGES ON mastercard.* TO 'mastercard'@'localhost' IDENTIFIED BY 'MasterCard@12345';
ERROR 1819 (HY000): Your password does not satisfy the current policy requirements

mysql> GRANT ALL PRIVILEGES ON mastercard.* TO 'mastercard'@'localhost' IDENTIFIED BY 'MasterCard@!#12345';
Query OK, 0 rows affected (0.00 sec)

Posted in Linux, MySQL | Tagged , | Leave a comment

Postfix Hardening

Make sure the Postfix is running with non-root account:
root@Philip:~#ps aux | grep postfix | grep -v ‘^root’

Change permissions and ownership on the destinations below:
root@Philip:~#chmod 755 /etc/postfix
root@Philip:~#chmod 644 /etc/postfix/*.cf
root@Philip:~#chmod 755 /etc/postfix/postfix-script*
root@Philip:~#chmod 755 /var/spool/postfix
root@Philip:~#chown root:root /var/log/mail*
root@Philip:~#chmod 600 /var/log/mail*

Edit file /etc/postfix/main.cf and add if necessary check & make the following changes:Modify the myhostname value to correspond to the external fully qualified domain name (FQDN) of the Postfix server, for example:
myhostname = mx.kanyakonil.com


Configure network interface addresses that the Postfix service should listen on, for example:
inet_interfaces = 192.168.1.1

Configure Trusted Networks, for example:
mynetworks = 10.0.0.0/16, 192.168.1.0/24, 127.0.0.1

Configure the SMTP server to masquerade outgoing emails as coming from your DNS domain, for example:
myorigin = kanyakonil.com

Configure the SMTP domain destination, for example:
mydomain = kanyakonil.com

Configure to which SMTP domains to relay messages to, for example:
relay_domains = kanyakonil.com

Configure SMTP Greeting Banner:
smtpd_banner = $myhostname

Limit Denial of Service Attacks:
default_process_limit = 100
smtpd_client_connection_count_limit = 10
smtpd_client_connection_rate_limit = 30
queue_minfree = 20971520
header_size_limit = 51200
message_size_limit = 10485760
smtpd_recipient_limit = 100

Restart the Postfix daemon:
service postfix restart

Posted in Linux, Mail server, Postfix | Tagged , | Leave a comment

Resolving subsys locked for

Today I was restarting my tomcat service and I saw

Tomcat didn't stop in a timely manner (pid[FAILED]) and subsys locked for tomcat

This means the service was running at one time, but has crashed.

When you start a service, it creates a “lock” file to indicate that the service is running. This helps avoid multiple instances of the service. When you stop a service, this lock file is removed.

When a running service crashes, the lock file exists but the process no longer exists. Thus, the message.

Look at the two areas /var/run/*.pid and /var/lock/subsys/*. These are expected to agree with each other. That is, if the (emtpy file) lockfile /var/lock/subsys/crond exists, then the first line of the file /var/run/crond.pid is expected to contain the PID of the process running for this service. If no such process is running, then something is wrong. If a process is indeed running (as you see) but it is not that PID, then something is probably confused.

Posted in Linux, Tomcat | Leave a comment

Resolving “Access denied; you need (at least one of) the PROCESS privilege(s) for this operation”

I do have logged in with a mysql user easypay who has all privileges on a DB easypay and was executing the command

show engine innodb status

Mysql gave error as

[Error Code: 1227, SQL State: 42000] Access denied; you need (at least one of) the PROCESS privilege(s) for this operation

Even though grant all permission on the specified I was getting error.

Simply run

GRANT SELECT, PROCESS ON *.* TO 'easypay'@'localhost';

and your troubles should be over.

If you have the PROCESS privilege for all DB(s), you can see all threads. If you have the SUPER privilege, you can kill all threads and statements. Otherwise, you can see and kill only your own threads and statements.

You can also use the mysqladmin processlist and mysqladmin kill commands to examine and kill threads.

Posted in Linux, MySQL | 2 Comments

Setting up Master Slave DNS server

The DNS ( Domain Name System ) is a distributed system, used for translate domain names to IP and vice a versa

Network Scenario for this Setup
Master DNS Server IP: 10.10.10.20 ( ns1.example.net )
Slave  DNS Server IP: 10.10.11.243 ( ns2.example.net )
Domain Name : demoexample.net   ( For Testing Purpose )
Domain IP   : 10.10.10.100  ( For Testing Purpose )
Install Required RPMS ( at Master and Slave Both )

Install bind packages at both Master and Slave dns servers using following commands.

# yum install bind bind-chroot
Setup Master (NS1) DNS Server

There are two types of configuration files in DNS.

  • One is main dns configuration files named “named.conf”
  • Another type of configuration file are called zone file. Which is individually created for all domains. named.conf keeps an entry for all zone files.
Configure named.conf using below configuration
# vim /var/named/chroot/etc/named.conf

Content of named.conf:

// /var/named/chroot/etc/named.conf
acl internals {
    127.0.0.0/8;
    10.10.10.0/24;
    10.10.11.0/24;
   115.254.78.93;
};

acl slaves {
    10.10.11.243/32;
    97.74.243.55/32;
    10.10.10.0/24;
};

acl trusted {
        10.10.11.240/28;
        10.10.10.0/24;
};

options {
        listen-on port 53 { 127.0.0.1; any; };
        listen-on-v6 { any; };
#       version "Please go Ahead";
        directory       "/var/named";
        dump-file       "/var/named/data/cache_dump.db";
        statistics-file "/var/named/data/named_stats.txt";
        memstatistics-file "/var/named/data/named_mem_stats.txt";
#        query-source    port 53;
#        query-source-v6 port 53;
        allow-query     { any; };
        allow-recursion {
                        slaves;
                        trusted;
                        internals;
                         };
        allow-transfer { slaves; };
};

#logging {
#        channel default_debug {
#                file "data/named.run";
#                severity dynamic;
#        };
#};

logging {
   channel default_syslog { syslog local2; severity notice; };
   category "default" { "debug"; };
   category "general" { "debug"; };
   category "database" { "debug"; };
   category "security" { "debug"; };
   category "config" { "debug"; };
   category "resolver" { "debug"; };
   category "xfer-in" { "debug"; };
   category "xfer-out" { "debug"; };
   category "notify" { "debug"; };
   category "client" { "debug"; };
   category "unmatched" { "debug"; };
   category "network" { "debug"; };
   category "update" { "debug"; };
   category "queries" { "debug"; };
   category "dispatch" { "debug"; };
   category "dnssec" { "debug"; };
   category lame-servers {null; };
   category edns-disabled { null; };
   channel "debug" {
     file "/var/log/named/named.log" versions 2 size 1024m;
     print-time yes;
     print-category yes;
   };
};


include "/etc/rndc.key";
controls {
        inet 127.0.0.1 port 953 allow { localhost; };
       };

view localhost_resolver {
        match-clients      { internals; };
        match-destinations { localnets; };
#        recursion yes;
        include "/etc/named.rfc1912.zones";
        include "/var/named/named.zones";
        include "/var/named/named_new.zones";
};
view "external" {
        match-clients      { any; };
        match-destinations { any; };
#        recursion no;

        include "/var/named/named.zones";
        include "/var/named/named_new.zones";
};
# vim /var/named/named.zones

Content of named.zones:

zone "example.net" IN {
        type master;
        file "example.net.zone";
        allow-transfer {
                10.10.11.243;
        };
};
zone "nethost.com" IN {
        type master;
        file "nethost.com.zone";
        allow-transfer {
                10.10.11.243;
        };
};
zone "testreflexologydayspa.com" IN {
        type master;
        file "testreflexologydayspa.com.zone";
        allow-transfer {
                10.10.11.243;
        };
};
zone "nethost.net" IN {
        type master;
        file "nethost.net.zone";
        allow-transfer {
                10.10.11.243;
        };
};
# vim /var/named/named_new.zones

Content of named_new.zones:

zone "sahana.on.com"{
       type master;
       file "s/p-sahana.on.com";
        also-notify { 64.68.200.91; };
       allow-transfer {
       10.10.11.243;
        64.68.200.91;
        72.52.2.1;
        64.68.196.10;
        64.68.192.210;
       };
};
zone "oahanacolleges.com"{
       type master;
       file "o/p-oahanacolleges.com";
        also-notify { 64.68.200.91; };
       allow-transfer {
        64.68.200.91;
       10.10.11.243;
        72.52.2.1;
        64.68.196.10;
        64.68.192.210;
       };
};
zone "1101baybay.ca"{
       type master;
       file "1/p-1101baybay.ca";
       allow-transfer {
       10.10.11.243;
       };
};
Create a zone file for your domain “example.net”
# vim /var/named/example.net

Content of zone file:

$ORIGIN .
$TTL 600        ; 10 minutes
example.net     IN SOA  sys.example.net. root.sys.example.net. (
                                2014021800 ; serial
                                7200       ; refresh (2 hours)
                                3600       ; retry (1 hour)
                                43200     ; expire (1 week)
                                3600       ; minimum (1 hour)
                                )
                        NS      ns1.example.net.
                        NS      ns2.example.net.
                        A       10.10.10.32
                        MX      0 example-net.mail.eo.outlook.com.
                        TXT     "v=spf1 include:outlook.com ~all"
                        SRV     100 1 5061 sipfed.online.lync.com.
$ORIGIN example.net.
adminfs                 A       10.10.11.29
autodiscover            CNAME   autodiscover.outlook.com.
home                    A       10.10.10.95
ns1                     A       10.10.10.20
ns2                     A       10.10.11.243
ns3                     A       10.10.11.243
webmail                        IN        A         10.10.10.64
*                              IN        A         10.10.10.64
Create a zone file for your reverse domain “10.10.10.in-addr.arpa.zone”
# vim /var/named/10.10.10.in-addr.arpa.zone

Content of zone file:

$ORIGIN .
$TTL 600        ; 10 minutes
10.10.10.in-addr.arpa IN SOA  ns1.example.net. root.example.net. (
                                2014032001 ; serial
                                7200       ; refresh (2 hours)
                                3600       ; retry (1 hour)
                                43200     ; expire (1 week)
                                3600       ; minimum (1 hour)
                                )
                        NS      ns1.example.net.
                        NS      ns2.example.net.
$ORIGIN 10.10.10.in-addr.arpa.
100                     PTR     cpanel.midinet.com.
120                     PTR     winpl.midinet.com.
150                     PTR     urban.ca.
20                      PTR     ns1.example.net.
85                      PTR     ratherlaugh.com.
86                      PTR     statusopenged.com.
87                      PTR     open.statusopenged.com.
88                      PTR     offresgetsmain.net.
89                      PTR     stat.offresgetsmain.net.
227                     PTR     devanorth.com.
84                      PTR     wiki.eausergroup.org.
55                      PTR     equipmentscheduling.com.
Start named service

Startnamed(bind) service using following command and setup auto start on system boot.

# /etc/init.d/named restart
# chkconfig named on
Setup Slave (NS2) DNS Server

At slave dns server you need to updatenamed.conf file only. All zone files will automatically synced from master dns server. Any changes done on Master will reflect on slave after a specified time interval.

Configure named.conf using below configuration
# vim /var/named/chroot/etc/named.conf

Content of named.conf

// /var/named/chroot/etc/named.conf
acl trusted {
        10.10.11.240/28;
        10.10.10.0/24;
        10.10.11.0/24;
};


options {
        listen-on port 53 { 127.0.0.1; any; };
        version "Please go Ahead";
        directory       "/var/named";
        dump-file       "/var/named/data/cache_dump.db";
        statistics-file "/var/named/data/named_stats.txt";
        memstatistics-file "/var/named/data/named_mem_stats.txt";
#        query-source    port 53;
#        query-source-v6 port 53;
        allow-query     { any; };
        allow-transfer { none; };
        allow-recursion { trusted;};
        allow-notify {trusted;};

};
#logging {
#        channel default_debug {
#                file "data/named.run";
#                severity dynamic;
#        };
#};


logging {
   channel default_syslog { syslog local2; severity notice; };
   category "default" { "debug"; };
   category "general" { "debug"; };
   category "database" { "debug"; };
   category "security" { "debug"; };
   category "config" { "debug"; };
   category "resolver" { "debug"; };
   category "xfer-in" { "debug"; };
   category "xfer-out" { "debug"; };
   category "notify" { "debug"; };
   category "client" { "debug"; };
   category "unmatched" { "debug"; };
   category "network" { "debug"; };
   category "update" { "debug"; };
   category "queries" { "debug"; };
   category "dispatch" { "debug"; };
   category "dnssec" { "debug"; };
   category lame-servers {null; };
#   category edns-disabled { null; };
   channel "debug" {
     file "/var/log/named/named.log" versions 2 size 150m;
     print-time yes;
     print-category yes;
   };
};

include "/etc/rndc.key";
controls {
        inet 127.0.0.1 port 953 allow { localhost; };
       };
view localhost_resolver {
        match-clients      { localnets; };
        match-destinations { localhost; };
#        recursion yes;
        include "/etc/named.rfc1912.zones";
        include "/var/named/named.zones";
        include "/var/named/named_new.zones";
};
view "external" {
        match-clients      { any; };
        match-destinations { any; };
        include "/var/named/named.zones";
        include "/var/named/named_new.zones";
};
# vim /var/named/named.zones
zone "example.net" IN {
        type slave;
        masters { 10.10.10.20; };
        file "example.net.zone";
};
zone "nethost.com" IN {
        type slave;
        masters { 10.10.10.20; };
        file "nethost.com.zone";
};
zone "reflexologydayspa.com" IN {
        type slave;
        masters { 10.10.10.20; };
        file "reflexologydayspa.com.zone";
};
zone "nethost.net" IN {
        type slave;
        masters { 10.10.10.20; };
        file "nethost.net.zone";
};
zone "westmountroutes.com" IN {
        type slave;
        masters { 10.10.10.20; };
        file "westmountroutes.com.zone";
};
zone "siteinmotionhosting.com" IN {
        type slave;
        masters { 10.10.10.20; };
        file "siteinmotionhosting.com.zone";
};
# vim /var/named/named_new.zones
zone "iaaos.ca"{
       type slave;
       masters { 10.10.10.20; } ;
       file "i/s-iaaos.ca";
};
zone "saco.ca"{
       type slave;
       masters { 10.10.10.20; } ;
       file "o/s-saco.ca";
};
zone "schooldelontario.ca"{
       type slave;
       masters { 10.10.10.20; } ;
       file "c/s-schooldelontario.ca";
};
zone "saco.on.ca"{
       type slave;
       masters { 10.10.10.20; } ;
       file "s/s-saco.on.ca";
};
zone "ontarioschool.ca"{
       type slave;
       masters { 10.10.10.20; } ;
       file "o/s-ontarioschool.ca";
};
zone "1101bay.ca"{
       type slave;
       masters { 10.10.10.20; } ;
       file "1/s-1101bay.ca";
};
zone "1101bay.com"{
       type slave;
       masters { 10.10.10.20; } ;
       file "1/s-1101bay.com";
};
# vim /var/named/example.net.zone
$ORIGIN .
$TTL 600        ; 10 minutes
example.net     IN SOA  ns1.example.net. root.ns1.example.net. (
                                2014021800 ; serial
                                7200       ; refresh (2 hours)
                                3600       ; retry (1 hour)
                                43200     ; expire (1 week)
                                3600       ; minimum (1 hour)
                                )
                        NS      ns1.example.net.
                        NS      ns2.example.net.
                        A       10.10.10.32
                        MX      0 example-net.mail.eo.outlook.com.
                        TXT     "v=spf1 include:outlook.com ~all"
                        SRV     100 1 5061 sipfed.online.lync.com.
$ORIGIN example.net.
adminfs                 A       10.10.11.29
autodiscover            CNAME   autodiscover.outlook.com.
home                    A       10.10.10.95
ns1                     A       10.10.10.20
ns2                     A       10.10.11.243
ns3                     A       10.10.11.243
webmail                 A       10.10.10.64
*                       A       10.10.10.64
# vim /var/named/10.10.10.in-addr.arpa.zone
$ORIGIN .
$TTL 600        ; 10 minutes
10.10.10.in-addr.arpa IN SOA  ns1.example.net. root.example.net. (
                                2014032001 ; serial
                                7200       ; refresh (2 hours)
                                3600       ; retry (1 hour)
                                43200     ; expire (1 week)
                                3600       ; minimum (1 hour)
                                )
                        NS      ns1.example.net.
                        NS      ns2.example.net.
$ORIGIN 10.10.10.in-addr.arpa.
100                     PTR     cpanel.midinet.com.
120                     PTR     winpl.midinet.com.
150                     PTR     urban.ca.
20                      PTR     ns1.example.net.
85                      PTR     ratherlaugh.com.
86                      PTR     statusopenged.com.
87                      PTR     open.statusopenged.com.
88                      PTR     offresgetsmain.net.
89                      PTR     stat.offresgetsmain.net.
227                     PTR     devanorth.com.
84                      PTR     wiki.eausergroup.org.
55                      PTR     equipmentscheduling.com.
Start named Service

Startnamed(bind) service using below command.

# /etc/init.d/named restart
# chkconfig named on

After restartingnamedservice, Check zone files on slave dns server at /var/named/chroot/var/named/slaves/.

Step 4: Finally Test Your DNS Setup

Query to your Master and Slave DNS Server directly using following commands, You will get the same resonse from both servers.
Syntax: nslookup <domainname.com> <dns server name/ip>

Query to Master DNS Server:

# nslookup demoexample.net 10.10.10.20

Server:         10.10.10.20
Address:        10.10.10.20#53

Name:   demoexample.net
Address: 10.10.10.100

Query to Slave DNS Server:

# nslookup demoexample.net 10.10.11.243

Server:         10.10.11.243
Address:        10.10.11.243#53

Name:   demoexample.net
Address: 10.10.10.100

Above outputs is showing that dns server has successfully resolved domain demoexample.net from master and slave dns servers.

Posted in DNS, Linux | Leave a comment

Fix for InnoDB: ERROR: the age of the last checkpoint is …

I recently have to restore production DB to local environment and I saw mysql log giving with bunch of errors like this

InnoDB: largest such row.
150817 23:22:56  InnoDB: ERROR: the age of the last checkpoint is 9440934,
InnoDB: which exceeds the log group capacity 9433498.
InnoDB: If you are using big BLOB or TEXT rows, you must set the
InnoDB: combined size of log files at least 10 times bigger than the
InnoDB: largest such row.
150817 23:23:25  InnoDB: ERROR: the age of the last checkpoint is 9439873,
InnoDB: which exceeds the log group capacity 9433498.
InnoDB: If you are using big BLOB or TEXT rows, you must set the
InnoDB: combined size of log files at least 10 times bigger than the
InnoDB: largest such row.
150817 23:23:51  InnoDB: ERROR: the age of the last checkpoint is 9442549,
InnoDB: which exceeds the log group capacity 9433498.
InnoDB: If you are using big BLOB or TEXT rows, you must set the
InnoDB: combined size of log files at least 10 times bigger than the
InnoDB: largest such row.

Well, what does all this mean?
So, as it seems, the InnoDB log file settings need to be updated. I found a listing of the steps to take on MySQL’s website. Here are those steps fleshed out a little.
1) Make sure your innodb_fast_shutdown settings is not 2To fix this, set it to one by runnning the following query:

SET GLOBAL innodb_fast_shutdown = 1;

2) Shut down mysql and look for errors in the log to make sure nothing went wrong.

service mysqld stopcat /var/log/mysql.log

3) Copy the old log files to a new place in case something goes wrong.

mv /var/lib/mysql/ib_logfile* ..
4) Next edit your /etc/my.cnf file to increase your InnoDB log size:

innodb_log_file_size = 128M

You may see people suggesting really large values for the log file size — I saw a value of 768M in one StackOverflow answer. If that seems like a suspiciously large, random value to you (especially considering the default is 5M) then you’re on to something. But that begs the question, what should the value be? Here is a helpful article on how to properly size your log files.
5) Lastly, watch your /var/log/mysql.log file and start MySQL back up.

service mysqld start

One helpful tip, if mysql gives any error then you probably tried to skip step 3, like I did. Turns out, this is an important step and your MySQL server may not even start up, without it. It’s easy to fix though, either go back and do step 3 or remove your edits made in step 4 and restart mysqld. You should be all set.
Posted in Linux, MySQL | Leave a comment

How to (Automatically) Backup Your Website into Dropbox

As owners of websites, one of the more important things you should do is to regularly backup the website. Most web hosting providers will enable daily or weekly backups, mainly for their disaster recovery purpose only. You can do backup of website by yourself using the Backup function in hosting control panels like cPanel, Plesk and DirectAdmin.

A good backup should have following criteria:

  • Backup your data as frequently as possible.
  • Give higher priority to critical data like database and web contents. Try to exclude temporary files.
  • Your backup should NOT be saved inside the same server.
  • Your backup should be retrievable and accessible anytime, anywhere.
  • You should get notified for every backup status which has been scheduled.
  • Your backup should be compressed, if disk space or bandwidth is your concern.

Cloud storage is becoming the best way to store files. Popular providers like Amazon S3, Dropbox, iCloud and Box.net are offering these facilities for free with some limitations. But, none of them are supporting FTP as the medium to transfer while almost all of webhosting providers only allow this transfer method.

Backup Box

Here’s where Backup Box comes in. Backup Box helps you securely transfer anything on an FTP server to your Dropbox account. Actually, Backup Box can integrate your FTP account with cloud storage providers like Amazon, GitHub, Box.net and Flickr as well. At this very moment, only Dropbox integration is supported while the others are still under development. It is free to use, with limited features like monthly backup schedule and immediate transfer schedule. In this post, I am focusing on preparing the backup data for weekly backup while running on cPanel server.

We can use this tool with various ways of implementation such as 1, directly copying the web directory using FTP and transferring to Dropbox (compressed or uncompressed) or 2, creating a compressed backup (cPanel backup) and using FTP to fetch the backup to Dropbox.

Before we proceed with the tutorial, ensure that you have following required information:

  • An FTP account which is mapped to your web directory. Get it from your hosting control panel.
  • A Dropbox account. You can register here for free.
  • A Backup Box account. You can register here for free.

Web directory > FTP > Dropbox

Since the database is also important, we need to prepare the database backup and put it into our web directory. If you are running on Linux hosting, you can use a task scheduler called a cron job with some help from mysqldump. In cPanel, it is located under cPanel > Advanced > Cron jobs.

Let’s use the following data as an example:

1
2
3
Web directory path: /home/mycpanel/public_html
cPanel username: mycpanel
cPanel password: mypass123$

Create a new weekly cron job and use the following command:

1
mysqldump --opt -Q -u mycpanel -p'mypass123$' --all-databases > /home/mycpanel/public_html/databases.sql

An Example:

This will create an SQL backup file which includes all the databases under your cPanel account. Login into Backup Box. On the left panel, login into the FTP account by clicking the ‘gear’ icon. On the right panel, login into your Dropbox account.

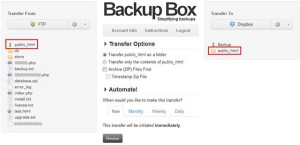
transfer-public-html

You can choose Transfer public_html as a folder in the Transfer Options. This will transfer the whole public_html folder including all files into your Dropbox account. You can now start the immediate transfer by clicking Review. This will transfer the public_html folder to Dropbox. Once done, you can create Monthly schedule to automate this backup task monthly. Just click Monthly > select Date and Time > Finalize and Run. Note: If you want to use weekly or daily backup, you need to upgrade your subscription as stated in the website. Do not forget to change the cron job setting based on when you want the backup schedule to happen

cPanel backup > FTP > Dropbox

The good thing about cPanel is you can generate your own backup automatically using cPanel API. In this case, we will use PHP script to run on schedule to generate backup. Since the backup location needs to be exclusively for Backup Box, we will need to create an FTP account which is mapped to a new backup folder.

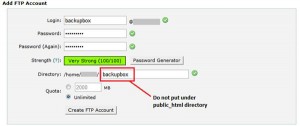
Go to cPanel > FTP and create an FTP account as the screenshot below. Do not create the FTP directory under public_html because it is accessible publicly via web browser (unless you protect the directory with a password):

add-ftp-account

We need to use PHP with cPanel API to trigger the backup process. Download this file (cpanel-php-backup.zip) and unzip it. You should see 2 files, cpanel-backup.php and xmlapi.php.inc. Change all required information inside cpanel-backup.php as below:

1
2
3
4
5
6
7
8
9
// Credentials for cPanel account
$source_server_ip = ""; // Server IP or domain name eg: 212.122.3.77 or cpanel.domain.tld
$cpanel_account = ""; // cPanel username
$cpanel_password = ""; // cPanel password
// Credentials for FTP to Backup Box
$ftpacct = ""; // FTP account
$ftppass = ""; // FTP password
$email_notify = ''; // Email address for backup notification

Save the file and upload both files into your public_html directory using FTP. You can start to generate a backup by accessing the PHP file directly via browser, which is usually http://www.yourwebsite.com/cpanel-backup.php .

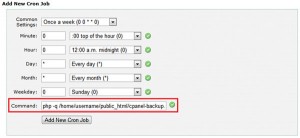
In order to automate cPanel backup creation, we need to setup a weekly cron job into cPanel and use following command:

1
php -q /home/username/public_html/cpanel-backup.php

Here is a sample:

add-new-cron-job

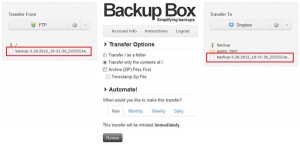
Login into Backup Box. On the left panel, login into the FTP account (use the backup box FTP account) and in the right panel, login into your Dropbox account:

transfer-only-content-of

Since we store backup files into a dedicated folder, we can only transfer the contents of it. Select Transfer only the contents of / in the Transfer Options as the transfer method.

You can now start the immediate transfer by clicking Review. This will transfer the public_html folder to Dropbox. Once done, you can create Monthly schedule to automate this backup task monthly. Just click Monthly > select Date and Time > Finalize and Run.

Note: If you want to use weekly or daily backup, you need to upgrade your subscription as stated in the website. If you do, do not forget to change the cron job setting according to your backup schedule. Another thing, the PHP script will delete all previous cPanel backup before it generate new backups. This to make sure your backup will not eat up much disk space.

Posted in Backup, CPanel | Tagged | Leave a comment